Camping Shower Guide: 6 Best Options for Clean on the Trail
Learn how to shower while camping with portable showers, solar setups, and DIY methods. Hygiene tips and gear picks for every camping style.
Introduction
Camping connects you with nature, but staying clean shouldn’t feel like a luxury. Whether you’re on a weekend car camping trip or a week-long backcountry adventure, a good camping shower setup makes the difference between feeling refreshed and counting the hours until you get home.
If you’re new to outdoor living, check out our camping guide for beginners to get the basics down first. And if you need the full bathroom solution, see our related guide on choosing a camping toilet to pair with your shower setup. This guide focuses specifically on how to shower while camping — from choosing the right portable camping shower to building your own DIY camp shower with items you probably already own.
The right approach depends on your trip length, group size, and camping style. A solo backpacker has very different needs than a family of four at a developed campground. We’ll cover all the options so you can pick what works for your situation.
Types of Camping Showers
Not all camping showers are built the same. Here’s a breakdown of the four main categories and when each one shines.
Solar Shower Bags
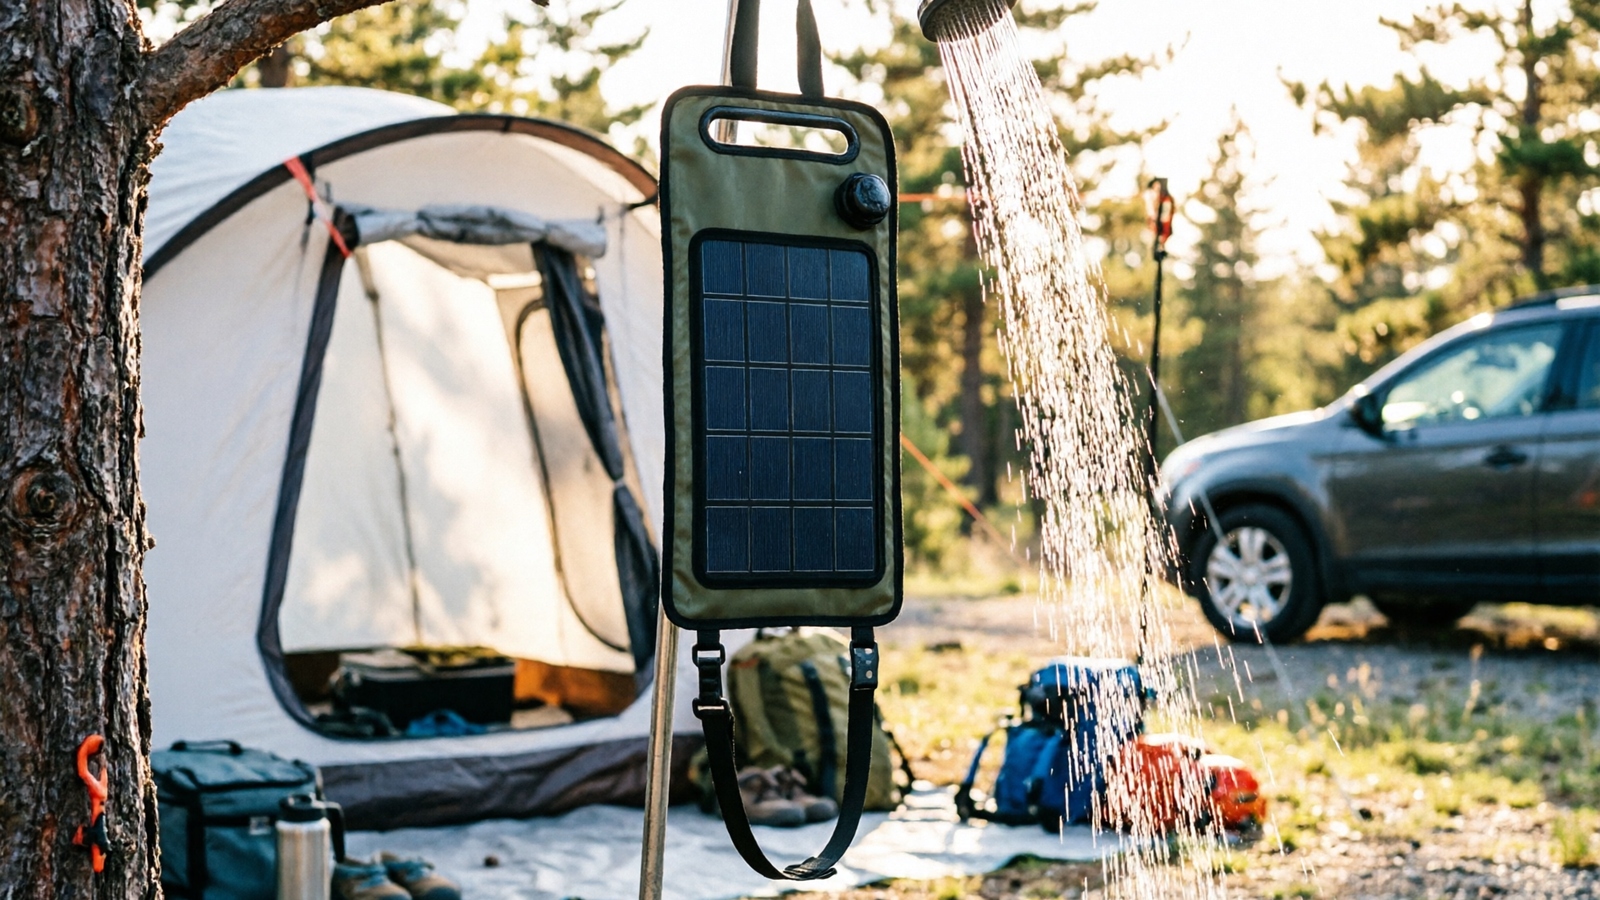
The simplest and most affordable option for a camping shower. Black PVC bags absorb sunlight to warm water naturally throughout the day. Most hold 3 to 5 gallons and cost under $20.
Solar shower bags work by absorbing heat from the sun into the black material, which transfers to the water inside. On a sunny 80°F day, you can expect water temperatures around 100 to 105°F after 2 to 3 hours of direct sunlight. The showerhead attaches to the bag with a simple hose and on/off valve.
The main limitation is flow rate. Gravity-fed pressure means the stream weakens as the bag empties. Hanging the bag higher improves pressure but requires a sturdy tree branch or pole rated for 40-plus pounds of water weight.
Best for: Car camping, warm-weather trips, budget-conscious campers.
Pressure-Powered Showers
Foot pump or hand pump units that deliver consistent water pressure without needing elevation. You fill a reservoir, pressurize it with a few pumps, and get a steady stream from the attached nozzle.
The big advantage here is control. You can adjust pressure on the fly and the flow stays consistent as the reservoir empties.
Most units hold 2 to 3 gallons — enough for a thorough rinse. Some models include a warming sleeve you can fill with heated water for added comfort.
Pressure-powered showers pack down smaller than solar bags and work in any weather since they don’t depend on sunlight. A quality camping shower pump like this delivers steady pressure without electricity. They’re a solid choice for spring and fall trips when solar heating is unreliable.
Best for: Backpacking, shoulder-season camping, campers who want reliable pressure.
Propane-Heated Showers
On-demand hot water using propane fuel. These units connect a propane tank to a water source and heat water instantly as it flows through a heat exchanger.
Propane camping showers deliver the closest experience to a home shower. Water comes out hot within seconds, and you can adjust the temperature with a dial. The trade-off is weight, bulk, and fuel dependency — a typical setup weighs 10 to 15 pounds and requires a standard propane cylinder.
These units draw water from a bucket or stream (with a filter), heat it through the exchanger, and pump it out through a showerhead. Setup takes about 10 minutes, and you need a stable surface to mount the unit.
Best for: Extended car camping, base camps, cold-weather trips where hot water is a priority.
Battery-Powered Portable Showers
Rechargeable USB pumps that work with any water container. The pump end goes into a bucket or water jug, and the showerhead delivers a steady stream on a single charge.
These are the lightest powered option, usually weighing under 2 pounds. A full charge lasts 30 to 60 minutes of continuous use — more than enough for several showers. The water comes out at ambient temperature unless you fill the container with warm water heated on your camp stove.
A portable shower for camping with USB rechargeable battery is popular with backpackers who want a powered rinse without the weight of propane or the bulk of a pressurized reservoir. They’re also handy for rinsing off sand at the beach or cleaning gear.
Best for: Backpacking, beach camping, quick rinses, ultralight setups.
The Spopal Portable Camping Shower runs on a 6000mAh battery with four spray modes and an IPX7 waterproof rating — solid for a full weekend of showers. For longer trips, the upgraded Spopal 8000mAh adds five adjustable speeds and IPX8 waterproofing. The Silanit USB-C Camping Shower charges via USB-C and comes with a mesh bag — a nice detail for keeping everything organized at camp.
How to Choose the Right Camping Shower
Picking the right camping shower comes down to three factors: how long you’re out, how you’re getting there, and what the weather looks like.
Trip Duration and Group Size
A weekend solo trip needs a very different setup than a week-long family outing. For solo trips under 3 days, a simple solar bag or battery-powered pump is usually plenty. You’ll use 2 to 3 gallons per shower and might only need one or two washes total.
For groups of 3 or more on longer trips, consider a propane-heated unit or a large-capacity pressure system. The best camping shower for group use is one that heats water on demand — you’ll go through more water than you think. Plan for at least 3 gallons per person per shower session. A 5-gallon solar bag sounds generous until four people need to share it.
Camping Style: Car Camping vs Backpacking
Weight and packed size matter enormously for backpacking. A 12-pound propane heater is a non-starter on the trail. Stick with battery-powered pumps or compact solar bags under 1 pound packed.
Car campers have more flexibility. You can bring a full shower tent, a propane unit, multiple water containers, and still have room for a cooler. If you’re driving to your campsite, there’s no reason to compromise on comfort.
Climate and Season
Solar camping showers work well in summer but struggle in cold or overcast conditions. If you’re camping in temperatures below 60°F, the sun won’t heat your water enough for a comfortable shower — even in direct sunlight.
Propane and battery-powered options are more reliable year-round since you can heat water on your stove regardless of weather. For winter camping, a propane shower is really your only practical option for warm water.
If you frequently camp in wet conditions, check out our guide to camping in the rain for tips on keeping your gear and yourself dry when the weather turns.
Setting Up Your Camping Shower
A good camping shower setup takes 15 to 20 minutes if you’ve practiced it once or twice. Here’s how to get it right.
Finding the Right Location
Choose flat ground with natural drainage, at least 200 feet from any lake, stream, or water source. This distance protects waterways from soap residue even if you’re using biodegradable products.
Avoid low spots where water pools after your shower. Look for slightly sloped ground or gravel areas that drain well.
If you’re using a hanging solar bag, find a sturdy branch at least 6 feet high that can support 40-plus pounds. Always test the branch before filling the bag.
Consider the sun’s path if you’re using a solar shower. South-facing spots (in the Northern Hemisphere) get the most direct light throughout the day.
Privacy Solutions
Privacy matters even at dispersed campsites. Here are your main options:
- Pop-up shower tents: The most reliable solution. They set up in minutes, provide full enclosure, and often include a mesh floor for drainage. They add weight and bulk but are worth it for group trips.
- Tarp shelters: String a tarp between two trees using paracord. A 6×8-foot tarp gives you enough coverage. Use bungee cords for quick setup and takedown.
- Vehicle windbreak: Park your car to create a natural barrier on one or two sides. Add a single tarp to close off the remaining open side for a quick privacy screen.
- Natural barriers: Large rocks, downed trees, and dense brush can provide partial screening. Combine with a small tarp for full coverage.
Water Heating Methods
How you heat your shower water depends on your setup:
Solar heating: Fill your solar bag in the morning and place it in direct sunlight. In summer, 2 to 3 hours brings water to 100 to 105°F. In cooler weather, expect 80 to 90°F after the same time.
Camp stove heating: Heat water in a large pot on your camp stove and mix it with cold water in your shower container. A 2:1 hot-to-cold ratio gives you comfortably warm water. Always test the temperature on your wrist before getting under the flow.
Propane on-demand: Connect water source and propane, turn on the unit, and adjust the temperature dial. Most units reach full heat in 30 seconds.
Camping Hygiene Best Practices
A camping shower is only part of the equation. Good hygiene habits keep you comfortable and healthy on the trail.
Water Conservation Techniques
Water is a precious resource when camping. The Navy shower method is your best friend: turn on the water to get wet, turn it off while you lather with soap, then turn it back on to rinse. Most people can complete a full shower with under 1 gallon using this technique.
Between full showers, keep a spray bottle filled with warm water for quick face and hand washes. Biodegradable body wipes handle everything else — they’re especially useful after a sweaty hike when a full shower isn’t practical.
For more ways to stay safe and comfortable outdoors, see our camping safety tips guide.
Eco-Friendly Soap and Disposal
Regular soap has no place in the backcountry. Even “gentle” brands contain phosphates and surfactants that harm aquatic life.
Always use biodegradable soap — brands like Dr. Bronner’s and Campsuds are widely available and effective.
Biodegradable doesn’t mean you can lather up in the creek. The soap still needs soil to break down properly.
Bathe at least 200 feet from any water source and scatter your gray water over a wide area of ground. In arid environments, let gray water filter through a mesh strainer before scattering.
Some campgrounds have designated gray water disposal sites. Use them when available.
Keeping Your Campsite Clean
A muddy shower area is uncomfortable and tracks dirt everywhere. Place a ground mat or old towel where you stand to keep your feet clean. Create a simple drainage path by digging a shallow trench leading away from your shower spot — fill it in before you leave.
Keep your dry clothes and towel within arm’s reach of your shower area but far enough away that they won’t get splashed. A waterproof stuff sack clipped to your shower tent or tarp works well for this.
DIY Camping Shower Solutions
Don’t want to buy a dedicated camping shower? You can build a functional camp shower DIY style with items you probably already have at home.
Simple Tarp and Bucket Shower
Punch small holes in the bottom of a 5-gallon bucket. Hang it from a tree branch with rope, fill it with water, and you’ve got a gravity shower. Control the flow by tilting the bucket or partially covering the holes with duct tape.
This setup works best if you heat water on your stove first and mix it to a comfortable temperature. The holes create a gentler rain-like flow compared to a standard showerhead.
Converted Garden Sprayer
A clean 2-gallon garden sprayer (never one that’s held chemicals) makes an excellent portable camping shower. Pump it to build pressure, and the wand gives you a controlled spray. The adjustable nozzle lets you switch between a fine mist and a concentrated stream.
Clean the sprayer thoroughly before your trip by running several tanks of clean water through it. The pressure holds for several minutes of showering before you need to re-pump.
Hanging Water Jug Method
Take a clean 1-gallon water jug and poke small holes in the cap with a hot needle or nail. Fill it with warm water, screw the cap back on, and hang it upside down from a branch. The holes create a surprisingly effective shower pattern.
This is the lightest and most portable DIY option. It’s ideal for backpackers who want a quick rinse without carrying dedicated shower gear. The main downside is limited capacity — one jug gives you about 2 minutes of flow.
Camping Shower Gear Checklist
Don’t forget these essentials when packing for your camping shower setup. You can find a complete packing list in our car camping checklist.
Shower equipment:
- Shower unit (solar bag, pressure pump, propane heater, or battery pump)
- Extra batteries or charging cable for powered units
- Propane canister (if using a propane shower)
Hygiene supplies:
- Biodegradable soap and shampoo
- Body wipes for between-shower cleanup
- Quick-dry microfiber towel
- Toothbrush, toothpaste, and deodorant
Privacy and comfort:
- Pop-up privacy tent or tarp with paracord
- Changing mat or ground cloth
- Waterproof bag for dry clothes
Water management:
- Water containers (minimum 5 gallons per person per day)
- Spray bottle for water-saving rinses
- Collapsible water jug for heating and mixing
Optional upgrades:
- Shower caddy or hanging organizer
- Biodegradable loofah or washcloth
- Portable mirror for face washing
Common Camping Shower Mistakes to Avoid
Even experienced campers make these shower mistakes. Learn from them before your next trip.
Setting up too close to water sources. That creek looks convenient, but bathing within 200 feet of any natural waterway contaminates the ecosystem. Walk the extra distance — it’s worth it.
Using regular soap. Your favorite body wash from home contains chemicals that don’t break down in nature. Switch to biodegradable soap for all outdoor washing.
Not testing water temperature. Solar-heated water can reach scalding temperatures on hot days. Propane units can spike unexpectedly. Always test the water on your wrist before stepping under the flow.
Forgetting dry clothes within reach. Nothing’s worse than finishing a shower and realizing your towel and clean clothes are 20 feet away in your tent. Set up a dry zone within arm’s reach before you start.
Underestimating water needs in hot weather. You sweat more, you drink more, and you need more water for showering. In temperatures above 85°F, increase your water budget by 50%.
Skipping the ground mat. Standing in mud during your shower defeats the purpose of getting clean. A simple foam pad or old towel keeps your feet dry.
When You Don’t Have a Shower
Sometimes a full shower isn’t possible — you’re backpacking light, the weather is freezing, or you simply don’t have the water to spare. Here’s how to stay reasonably clean without one.
Sponge bath method: Heat a pot of water on your stove, soak a bandana or washcloth, and wipe down your face, underarms, groin, and feet. These areas harbor the most bacteria and cause the most odor. A thorough sponge bath uses less than half a gallon.
Body wipes: Unscented biodegradable body wipes are the quickest way to freshen up. Focus on the same key areas and dispose of used wipes in your trash bag — never bury them.
Dry shampoo and powder: For longer trips, dry shampoo absorbs oil from your hair without water. Body powder helps prevent chafing and keeps you feeling fresh between washes.
Foot care: Clean feet prevent blisters and fungal infections. Rinse them in a separate container each evening and change into clean, dry socks.
Seasonal Considerations for Camping Showers
Your camping shower strategy should shift with the seasons.
Summer (June–August): Solar showers are at their peak. Water heats fast, evaporation helps with cooling, and longer days give you plenty of sunlight. The main challenge is keeping your water supply cold for drinking while heating some for showering.
Fall (September–November): Shorter days and cooler temperatures mean solar heating takes longer and may not reach comfortable levels. Switch to stove-heated or propane showers. Morning showers are cold — schedule yours for midday when temperatures peak.
Winter (December–February): Forget solar. Propane-heated showers or heated water from your stove are your only realistic options. Shower inside a tent or shelter if possible to avoid wind chill. Keep your shower session short — hypothermia is a real risk when wet in cold temperatures.
Spring (March–May): Unpredictable weather makes planning tricky. Bring a backup heating method even if you’re primarily using solar. Spring runoff can make natural water sources murky — always filter or treat water before using it for showering.
Conclusion
A camping shower doesn’t need to be complicated or expensive. From a simple solar bag to a propane-heated setup, there’s a solution for every camping style and budget. The key is planning ahead, respecting the environment with biodegradable products, and practicing your setup before heading out.
Start with the option that matches your trip. Car campers can go straight for a pressure-powered or propane unit.
Backpackers should look at battery-powered pumps or DIY solutions that weigh under a pound. And if you’re just testing the waters, a $15 solar shower bag and a pack of body wipes will get you through a weekend trip comfortably.
Whatever you choose, make it part of your pre-trip preparation. Set up your outdoor shower at home once or twice so you’re not figuring it out in the dark at camp. Your future self — clean, dry, and comfortable — will thank you.
Frequently Asked Questions
How do you shower while camping without a shower?
Use body wipes for quick cleanup, a sponge bath with warm water from a camp stove, or a simple solar shower bag hung from a tree branch. Even a spray bottle with warm water works for basic hygiene between proper washes.
What is the best portable camping shower?
Pressure-powered showers offer consistent flow without pumping. For budget options, solar shower bags under $20 provide adequate rinsing. Propane-heated models deliver hot water but require fuel and more setup.
Can you use regular soap when showering outdoors?
No. Regular soap contains phosphates and chemicals harmful to waterways. Always use biodegradable soap and bathe at least 200 feet from lakes and streams to protect the ecosystem.
How much water do you need for a camping shower?
A basic camp shower uses 2 to 4 gallons per person. Solar shower bags typically hold 5 gallons but most people use about half. Water-saving showerheads and Navy shower techniques can cut usage to under 1 gallon.
How do you set up a camping shower for privacy?
Use a pop-up shower tent for the most reliable privacy. Without one, string a tarp between trees or use your vehicle as a windbreak. Choose a flat spot away from your sleeping area with good drainage.
Are solar camping showers effective?
Yes, in sunny and warm conditions. A black solar bag placed in direct sunlight for 2 to 3 hours heats water to around 100°F. They work best in summer and are less effective in cool or overcast weather.